Lubing mechanical keyboard switches is one of the most effective modifications you can make to improve the feel and sound of your keyboard. A well-lubed linear switch feels noticeably smoother, with less scratchiness on the downstroke and a cleaner sound on the keystroke. A lubed tactile switch can feel more rounded and refined, though the process requires more care to preserve the tactile bump.

This guide is written for beginners who have never lubed switches before. It covers which lubricant to buy in India, what tools you need, and the complete process from removing switches to reinstalling them. The total time for a 65-percent keyboard (around 68 switches) is typically 2 to 4 hours on a first attempt. With practice, that comes down to around 1.5 hours.
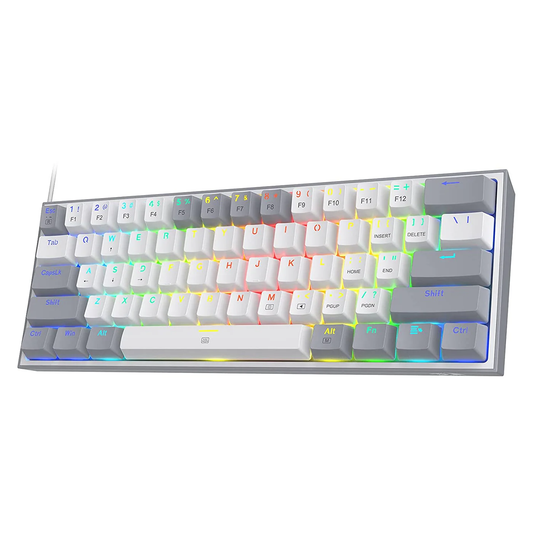
On a set of Leobog Graywood switches in an old Aula F75, applying Krytox 205g0 on stems and rails reduced the high-frequency scratchiness audible in a quiet room.
What You Need Before You Start
The Lubricant
The choice of lubricant is the most important decision in this process. The wrong lubricant applied to a switch can make it feel worse or even damage the switch over time. There are two lubricant families used for mechanical keyboard switches:
* Grease-type lubricants: thicker consistency, coat surfaces and stay in place. Used for switch stems and switch rails. The most common choice for linear switches. Krytox 205g0 and Tribosys 3204 are the two most widely recommended options. Krytox 205g0 is thicker and gives a slightly heavier, more cushioned feel. Tribosys 3204 is thinner and preserves more of the original switch feel while still reducing scratchiness.
* Oil-type lubricants: thinner consistency, flows into tighter spaces. Used for switch springs to reduce spring noise (also called spring ping). Krytox GPL 105 is the standard spring oil. It is applied to springs, not to stems or rails.
In India, Krytox 205g0 and Tribosys 3204 are available through specialized keyboard retailers and some listings on major e-commerce platforms. A 5-gram jar of Krytox 205g0 is enough to lube 200 to 300 switches, so a single purchase covers multiple keyboards.
|
Lubricant |
Type |
Best For |
Typical India Price |
Notes |
|
Krytox 205g0 |
Grease |
Linear switch stems and rails |
700-1200 per 5g jar |
The standard recommendation for linears |
|
Tribosys 3204 |
Grease (thinner) |
Linear stems, light tactile use |
800-1300 per 5g jar |
Lighter than 205g0; preserves tactile bump better |
|
Krytox GPL 105 |
Oil |
Switch springs |
500-900 per 5ml bottle |
Do not apply to stems or rails |
|
Dielectric grease |
Grease |
Stabilisers only |
200-500 per tube |
Not suitable for switch internals |
Note: do not use WD-40, cooking oil, petroleum jelly, or any general-purpose lubricant on keyboard switches. These will attract dust, degrade the switch housing over time, and make the switches feel worse within a few months.
Tools You Need
* Switch opener: a small plastic or metal tool that presses the switch clips and separates the top housing from the bottom housing. You can buy a switch opener for around 150 to 400 rupees in India. It is possible to open switches with a small flathead screwdriver, but a dedicated opener is faster and causes less housing damage.
* Small brush: a thin brush with soft bristles used to apply lubricant to switch internals. Size 00 or size 0 makeup brushes or model painting brushes work well. A set of small brushes typically costs 100 to 200 rupees.
* Keycap puller: a wire keycap puller is better than a plastic one for removing keycaps without scratching them. Most mechanical keyboards come with one in the box.
* Switch puller: required only if your keyboard is hot-swappable. A switch puller removes switches from the PCB without bending the pins. Most hot-swap keyboards include one in the box.
* Container for parts: a small tray, silicone mat, or any flat surface to keep switch parts organised. Switch components are small and easy to lose.
* Lubricant station (optional): a switch holder or lube station holds switches upright while you work on them. Not essential, but speeds up the process significantly. Available for around 400 to 800 rupees.
What Switches Can and Cannot Be Lubed
Before opening any switches, it is important to know which parts to lube and which to avoid.
* Linear switches: lube the stem legs, stem rails (the two vertical rails on the bottom housing), and the inside of the top housing where the stem contacts it. Optionally lube the spring.
* Tactile switches: lube the stem legs and the spring only. Do not lube the legs of the tactile bump (the part that creates the bump). Lubing the bump area directly reduces or eliminates the tactile feedback.
* Clicky switches: generally not recommended for lubing the stem or click mechanism. Lubing the click jacket or click bar area will reduce or remove the click. Spring lubing is acceptable and will not affect the click.
The rule for tactile and clicky switches: lube conservatively and avoid the parts of the stem that create the tactile or click feedback. When in doubt, lube less. You can always add more lubricant, but removing excess lube requires disassembly and cleaning with isopropyl alcohol.
The Lubing Process: Step by Step
Step 1: Remove the Keycaps
1. Place the keycap puller over a keycap and pull straight up with steady pressure. Do not wiggle side to side, as this can damage the switch stem.
2. Remove all keycaps and store them in a container. Note the layout if you are unsure of key positions.
Step 2: Remove the Switches (Hot-Swap Keyboards Only)
3. Use a switch puller to grip the switch from two sides. Apply even pressure and pull straight up.
4. If the switch does not release easily, check that you are gripping the correct clips on the switch housing, not the keycap stem.
For soldered keyboards: you need a desoldering pump or desoldering braid to remove switches. This is a separate skill. If you are not comfortable with soldering, stick to hot-swap keyboards or have the switches lubed before installation.
Step 3: Open the Switch
5. Place the switch in the switch opener with the top housing facing up.
6. Press down on the opener to depress the clips and separate the top housing from the bottom housing.
7. Lift off the top housing. You will see the stem sitting in the bottom housing with the spring underneath it.
8. Remove the stem and spring from the bottom housing. Keep all four components (top housing, bottom housing, stem, spring) together for each switch.
Step 4: Lube the Spring (Optional but Recommended)
9. Dip the tip of your brush lightly into Krytox GPL 105 oil, or use the bag lubing method: place the springs in a small zip-lock bag with a drop of GPL 105, seal the bag, and shake it for 30 seconds. Bag lubing is faster for large quantities.
10. If brush lubing: coat the exterior of the spring lightly. A thin, even coat is sufficient. Excess oil on springs does not improve the result.
Step 5: Lube the Stem
11. Hold the stem by the top (the part that the keycap sits on) and identify the four legs at the bottom.
12. Apply a thin coat of Krytox 205g0 or Tribosys 3204 to two of the four stem legs: the side legs that contact the bottom housing rails. Use the brush to apply a consistent thin coat. The coat should be visible but not thick enough to see pooling.
13. For linear switches: also coat the front and back legs lightly.
14. For tactile switches: do not lube the bump area on the two front legs. Lube only the sides of the legs, not the tactile bump surface.
Step 6: Lube the Bottom Housing Rails
15. Look at the inside of the bottom housing. You will see two vertical rails running up from the centre.
16. Apply a thin coat of lubricant to the inside of both rails, on the surfaces the stem legs travel along.
17. Do not apply lubricant to the leaf spring area (the small metal spring visible at the bottom of the housing that makes electrical contact).
Step 7: Lube the Top Housing (Optional)
18. A thin coat on the inside of the top housing where it contacts the stem can further reduce scratchiness. This is optional and has a smaller effect than lubing the stem and rails.
Step 8: Reassemble the Switch
19. Replace the spring in the bottom housing.
20. Place the stem back over the spring, with the stem legs aligned with the housing rails.
21. Press the top housing back onto the bottom housing until the clips click into place.
22. Test the switch by pressing it: it should feel smooth with no grinding or sticking.
Step 9: Reinstall Switches and Keycaps
23. For hot-swap keyboards: align the switch pins with the PCB socket and press straight down until the switch clicks into place. Check that both pins have entered the socket before pressing fully.
24. Replace all keycaps by pressing straight down on each one until it seats on the stem.
Common Mistakes to Avoid
* Using too much lubricant: excess lubricant causes switches to feel sluggish and can affect the electrical contact. A thin, even coat is always better than a thick application.
* Lubing the tactile bump area: on Brown, Akko, or Boba tactile switches, lubing the bump region directly removes the tactile feedback. Apply lubricant only to the sides of the legs and avoid the bump surface.
* Using the wrong lubricant: oil-weight lubricants are for springs only. Do not apply GPL 105 to stems or rails. Grease-type lubricants are for stems and rails.
* Bending switch pins during reinstallation: on hot-swap keyboards, always align the pins before pressing. A bent pin can damage the socket or prevent electrical contact.
* Not testing before closing: after lubing a few switches, install them and test before lubing the rest. This lets you verify the technique before committing to the entire keyboard.
Frequently Asked Questions
How long does lube last on keyboard switches?
A proper lube job with Krytox or Tribosys typically lasts 1 to 3 years of daily use before any noticeable degradation. The lubricant does not evaporate at room temperature. Dust accumulation over long periods can affect performance, but for most users, a single lube job covers the useful life of a budget or mid-range keyboard.
Can I lube switches without a switch opener?
Yes, though it is slower. A thin flathead screwdriver can depress the clips on most switches. The risk is scratching the housing exterior or breaking a clip if you apply too much force. A switch opener costs 150 to 400 rupees and makes the process faster and cleaner. For a keyboard with 80 or more keys, the opener is worth the cost in time saved.
Does lubing switches void the keyboard warranty?
Opening and modifying switches is considered a user modification and may affect the warranty offered by the keyboard brand. If the keyboard is still under warranty and you are experiencing issues unrelated to the switches, consider whether to defer lubing until the warranty period has passed. Most budget mechanical keyboards in India have a 1-year warranty.
Can I lube a keyboard that is not hot-swappable?
Yes, but you need to desolder the switches first. Desoldering requires a soldering iron and either a desoldering pump or desoldering wick. If you are not comfortable with soldering, this is a skill to learn separately before attempting it on a keyboard you are using daily. Some users choose to lube switches before installing them in a new soldered build.
Where can I buy switch lubricant in India?
Krytox 205g0 and Tribosys 3204 are available through keyboard-focused retailers online. Search for the specific product name on major e-commerce platforms. Vrkaa.com is a source for mechanical keyboard accessories in India. Prices for a 5-gram jar typically range from 700 to 1300 rupees, depending on the lubricant type and seller.
Summary
Lubing switches is a mod with a clear and immediate effect. The difference between unlubed and lubed Outemu Red switches is audible and tactile within the first few keystrokes. For budget keyboards where the stock switches are functional but rough, a lube job is often the most cost-effective way to close the gap with more expensive options.
The process requires patience on the first attempt. Most people take 3 to 4 hours the first time, and the result is almost always worth it. With practice, the same process takes half the time. If you are on the fence, start by lubing just the switches on one row of your keyboard and compare the feel with the rest before committing to the full board.